Using File Import/Export
The general flow of file importing/exporting can be described by the following steps. Click on a step to find out more.
- Determine file location.
- Select an object.
- Define a template.
- Set up data for transcribing, if needed.
- Import or export the data.
You may want to review some important things to keep in mind when importing and exporting, as well as check out examples on our Getting Started page.
File Location
Data files for imports and exports are required on the application server for Enterprise Management. Getting them onto the server for a cloud site can be done either by selecting the file from a client machine while manually running the import/export, or by uploading the file to a storage location on the server prior to importing or exporting.
Data files on the server
Enterprise Management includes several predefined folders on the server that are referred to as storage areas. These areas are used for the many types of data files used by Enterprise Management and are named according to their use. For the purposes of importing and exporting, it is recommended to use the TMP area or to create a new folder.
Storage areas
Creating a storage area
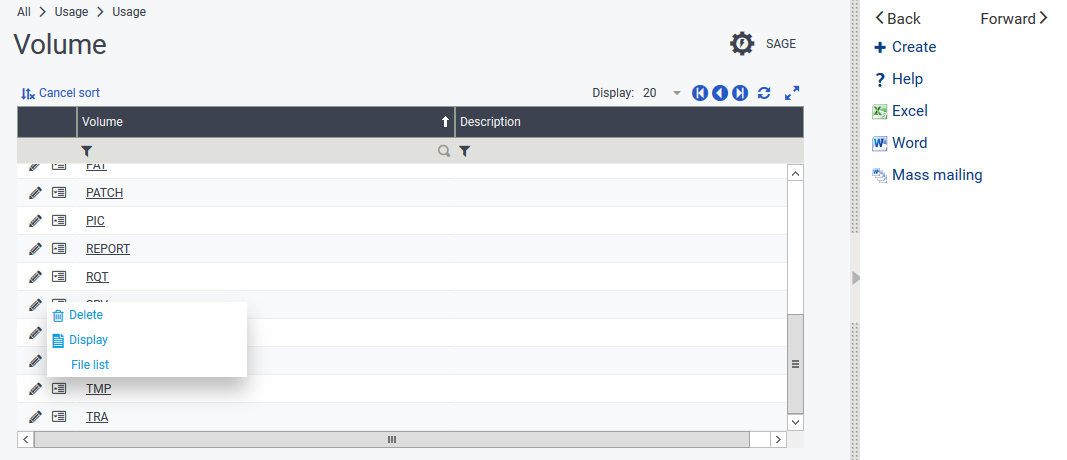
- In Enterprise Management, navigate to Usage > Usage > X3 Storage Areas.
- On the Volume screen, click Create.
- Enter a Volume, a Description and a Root. The Volume is the area name that will be displayed in lookups. The root is the folder name under the main folder for the endpoint.
- Click Save.
Using a storage area
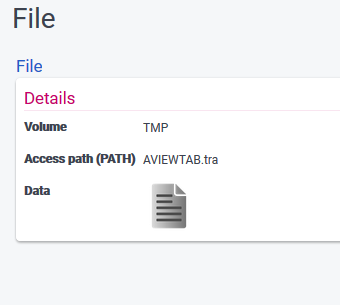
Once the storage area is in place, use the action button next to the volume to go to the related File list. You can upload a file there by clicking Create, or download it by clicking the file name and then clicking the file icon.”
Data files on the client
The user interfaces for imports and exports provide the user with a simple way to transfer files between the server and client machines. When setting up the import or export, select the Client radio button next to the file. When execution begins, you can select the source/destination file.
For imports, the selected file is uploaded automatically to the TMP folder in the X3 Storage Area, and used for the import.
For exports, the results are written to a file in the TMP folder in the X3 Storage Area, and the user is prompted to save the file locally or open it using a local application, such as notepad.exe.
Select an Object
Determine the object to be used in the template
Determine if a default template already exists that would be suitable for use. For example, for imports of customers, the BPC object is provided and will allow importing the customer identity, addresses, etc. Default templates are available in the SEED folder and can be copied to a live folder. Navigate in Enterprise Management to Setup > Usage > Imports / Exports > Import/export templates to access the default templates.
Note: We recommend making a copy of default templates rather than directly modifying them because updates to the SEED folder could potentially overwrite any changes.
Defining templates
While creating your template, it may be helpful to export at least one of your existing records so that you can see the data for each field and match it to your import source file. Determine the fields that need to be imported for each object. Refer to “Import/export templates Module Common Data” on the online help center for more information on the required fields and the tables used.
File Formats
Use Setup > Usage > Imports/exports > Import/export templates to define the file formats used to extract data from the database. This function automates the process of importing and exporting data through the use of customizable templates. The following structures can be used when importing or exporting data:
- Flat file with fixed length fields
- Flat file with separators between the fields (and records)
- XML file
- CSV file
Templates can be customized to meet a company’s specific needs.
It is a good idea to copy an existing template (by modifying the code name) so that future upgrades to the application do not overwrite the template.
The import/export template uses objects in order to update the database. An object is defined by a group of tables and screens, as well as the standard actions associated with the fields and the update.
All the controls and actions necessary during the database update are carried out because a single description for the object is used to generate the code relative to an online update and an update by import.
When an object only updates a single table, the import template describes the list of fields from the table to be integrated. Remember that a block of data from the file to be imported or exported contains the data for a record.
When several tables are updated by an object (for example the header and the lines), several blocks of data are found for an instance of the object to be integrated.
It is possible to import a table without associating an object with it. The empty object field is left for this purpose, and the table and the fields concerned are entered in the grid on the Fields tab. The import is then made without any control, apart from those deduced from the formats associated with the data types of the fields.
The following table shows some commonly-used templates for importing/exporting data to a file:
| Import Type | Template Code |
|---|---|
| Products | ITM |
| Product Site | ITF |
| Standard Cost | ITC |
| Customers | BPC |
| Suppliers | BPS |
| Sales Price Book | SPL |
| Sales Orders | SOH |
| Customer BP Invoices | BIC |
| Purchase Price Lists | PPL |
| Purchase Orders | POH |
| Supplier BP Invoices | BIS |
| Accounting Entries | GAS |
| Financial Budgets | BUD |
Transcribing Data
Transcribing creates a correspondence between internal and external data values. For example, an external application may use the value “CHECK” for a payment type field while Enterprise Management uses “CHK”. The import/export process can tranform these values from one to another through the use of transcribing.
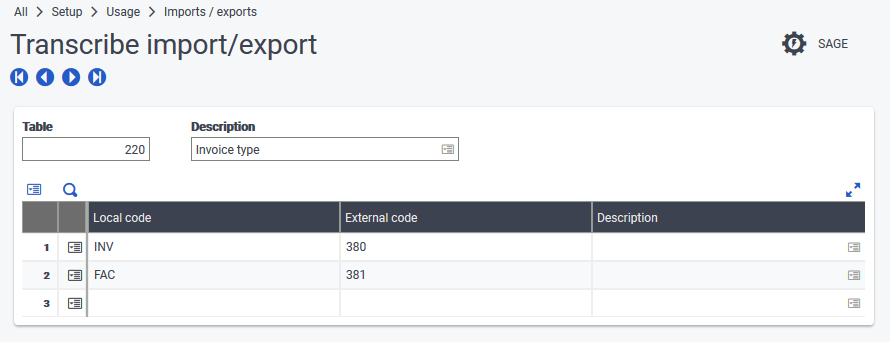
Transcribe import/export function
This function can be found in Enterprise Management at Setup > Usage > Imports/exports > Transcribe import/export. Once a transcribing table is defined, it can be specified on fields in a template.
-
In the Local code field, define the code used in Enterprise Management.
-
In the External code field, define the code used in the files for the data to be imported or exported.
The table definition defines the mapping between the original value being imported or exported, and the transcribed value that will replace it. The following principles apply:
- For exports, a search for the field’s original value is performed on the values in Local code and then transcribed to the value in External code.
- For imports, the External code column is searched and the value is transcribed to the Local code value.
- Spaces are not allowed in the Local code and External code values.
- To provide a default in the column being searched, use an “*” as the value. This will match any value not explicitly listed. If this default is not included, unlisted values will not be transcribed.
- If the column being searched includes the same value more than once, the first transcription will be used.
- To prevent a specific value from being transcribed, set the transcribed value to “*”.
Transcribing example
| Local code | External code |
|---|---|
| A | 1 |
| B | 2 |
| C | 3 |
| D | 3 |
| C | 4 |
| D | * |
| * | 6 |
- For an export:
- A is replaced by 1
- B is replaced by 2
- C is replaced by 3 (the first C instance found)
- D is replaced by 3 (the first D instance found)
- Any other code is replaced by 6
- For an import:
- 1 is replaced by A
- 2 is replaced by B
- 3 is replaced by C (the first 3 instance found)
- 4 is replaced by C
- 6 remains 6
- Any other value is replaced by D
Table Ranges
We recommend that you use a table number in the 600-999 range because numbers lower than 600 can be overwritten by updates to the application.
Important Concepts
- The structure of the files to be imported or exported depends on the extraction or integration capabilities of the external software. The data must be organized in logical groups of lines, which can be of different types (such as header, detail, or sub-detail) or of a single type. The organization of these groups is defined in the template.
- The import process uses the value of the object’s primary key to determine if a record already exists. This means that all fields in the primary key must be included in templates. Records missing key values will be created only if the values can be assigned automatically, for example by means of a sequence number counter.
- An import corresponds to an entry simulation for all the screens linked to the imported object.
- It processes all the fields in the screen by carrying out the same checks as an interactive entry.
- It does not take into account the fields that cannot be entered in the screen (except in specific and referenced cases). As a result, the fields included in a template corresponding to a field that cannot be entered are not imported.
- The order in which the fields are entered within the template has no importance. The import loads data from all the fields, then imports them in the order they appear in the screens.
- Any number of data exports is possible regardless of the object, but this is not always the case for the import. The automatic mechanisms used to decode the data flow and the call to the conditions linked to the object greatly automate the import. However, this is not enough for an automatic import of complex objects. Therefore, not all objects can be imported.
See the online help center inside Enterprise Management for information about templates for specific entitities.